

Waterproof Your LED Hula Hoop
Your Psikohoop is made to be somewhat weatherproof but not completely waterproof. The connector is made as tight as possible and has a rubber insert to stop water getting into the USB port. The membrane switch is seated tightly, the tubing is heated before the connector is placed so that the joins are sealed. However, none of this is a guarantee that some water will not find its way into the hoop especially if the hoop is left wet for any length of time or falls into water. Seawater is especially corrosive and an enemy of electronic parts.
When the hoop is disconnected or not fully connected it will definitely not be waterproof, and if water gets inside the hoop that may be the end of it. Once the Psikohoop is properly closed, you should be able to leave it lying in the wet grass for a few minutes, hoop with it in the rain and snow, have it get muddy at a festival, or survive the dust at burning man, etc. The hoop may NOT survive falling into water (unless its just for an instant).
If the hoop does get wet, then as soon as possible dry the area around the switch and connector, then open the hoop up and dry the open end of the USB port and the inside of the coupler piece that the USB port fits into. Flick/tip any water out, then use a cloth or paper towel and/or cotton swabs. Leave the hoop open in a dry and safe place to let the water evaporate completely and make sure the insides of the hoop are dry. You could use a hair drier, or compressed air, but don’t overheat the tubing. Keep the tip of the hair drier at least an inch away from the tubing, and keep moving it back and forth, not longer than half a minute.
To waterproof your led hula hoop, it takes a few minutes, a couple tools and some materials. It has to be done each time you want to waterproof your led hula hoop or each time you charge the hoop. Please do not attempt to do this without the right tools or materials or without fully understanding the instructions – email merlin@psihoops.com if you have any doubt or questions. You could damage the tubing or kill the hoop with water and neither of these will be covered by warranty.
Materials needed for fully waterproofing hoop:
- 6-inch length of clear shrink wrap tubing, I get mine at www.mcmaster.com part 9920T3 or 7132K519 You want 1” shrink tubing that has a shrink ration of 2 to 1, and has the lowest shrink temperature so you won’t overheat the hoop tubing.
- Clear silicone sealant. You can get this in small 2 or 3 ounce tubes at a hardware store.
- Test paper strips for the presence of water I use cobalt chloride strips from Amazon.
Tools needed:
- Utility knife and/or scissors,
- paper towel or rag
- Plastic knife or anything that will spread the silicone gel, you could use your finger
- Heat gun or powerful hair drier
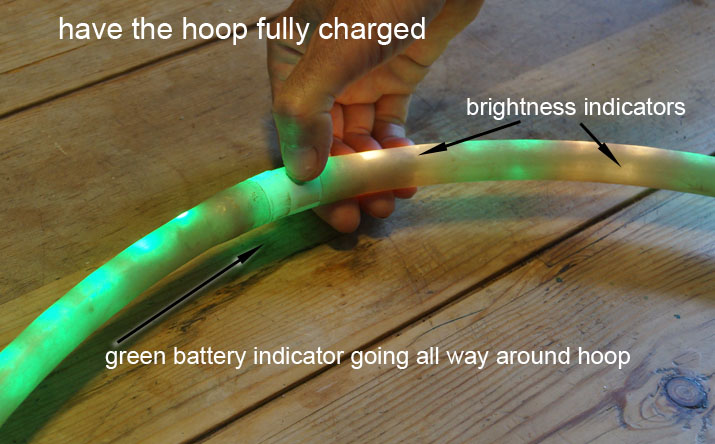
1 – Charge your hoop fully, green battery indicator goes all way around the hoop when it’s unplugged and you turn it on to check. (you won’t be able to charge your hoop once you waterproof it, though it should keep its charge for weeks if you don’t use the hoop).
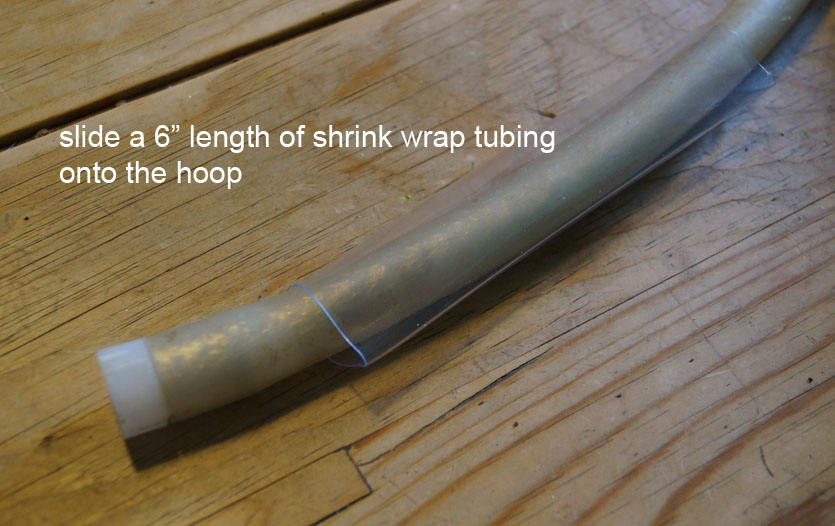
2 – Disconnect the hoop and slide a 6” length of shrink wrap tubing onto the hoop.
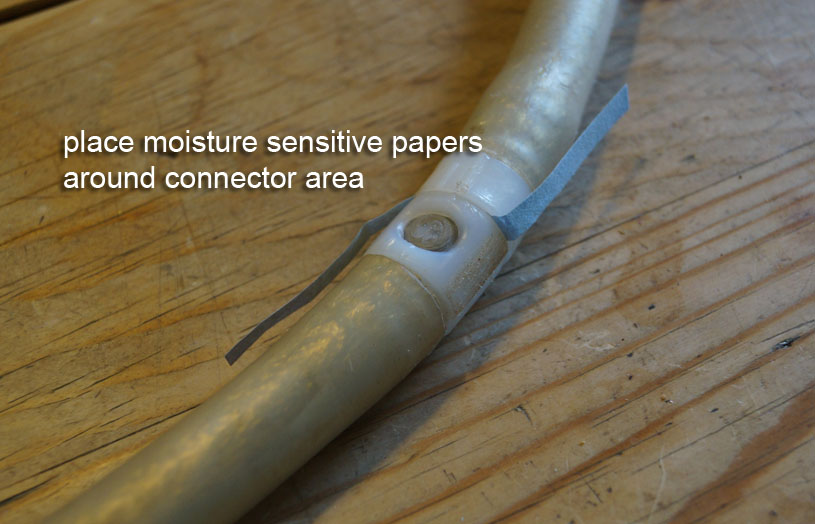
3 – Connect the hoop with one end of each of the 2 of the small thin cobalt paper strips caught in between the connector pieces….this paper will change color if it gets wet (mine goes from blue to pink) and so gives you an indicator if any water gets under the shrink wrap.
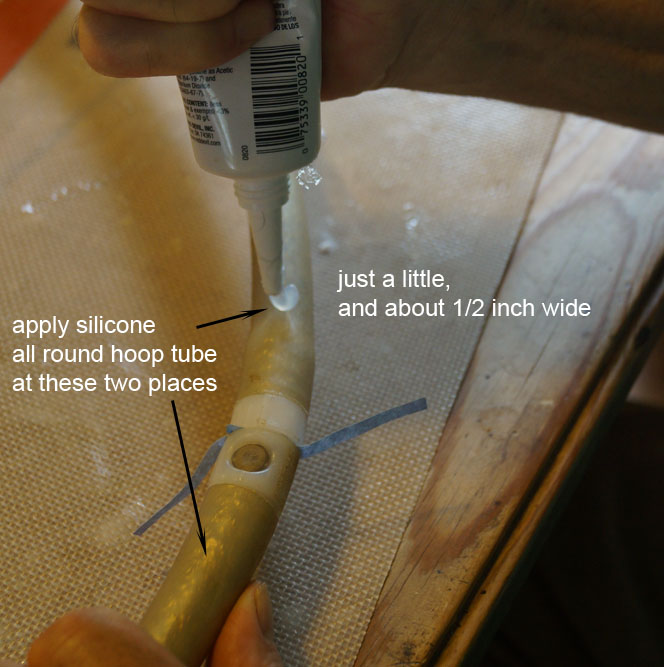
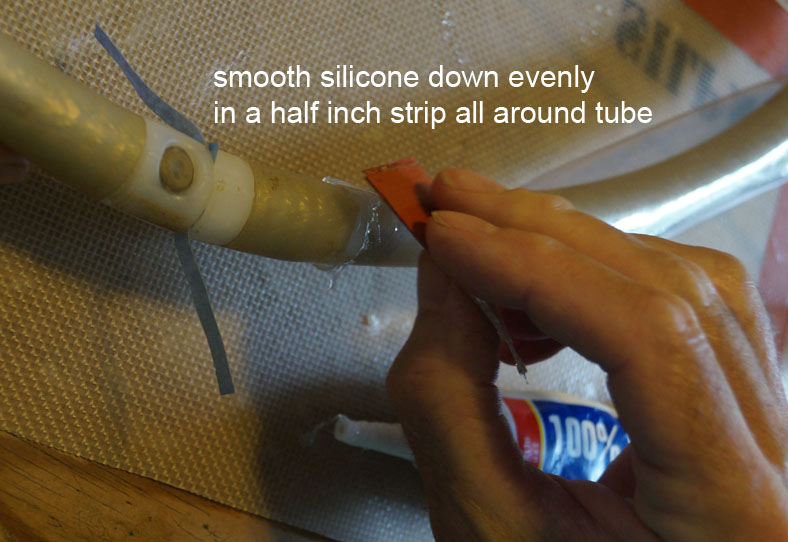
4 – Put a thin film of silicone around the hoop tubing just before the tubing starts to get wider around the connector, so the silicon is on the flat part of the tubing that is just beyond the connector on each side. You don’t want huge amounts of silicone, just enough to coat the tube evenly all the way around with no gaps – make it about ½ inch to ¾ inch wide (about the width of a finger to the width of a thumb)
5- Slide the shrink wrap tubing over the silicone (it will spread some of the silicone but try to do it so you disturb the silicone as little as possible). Have the shrink wrap even on both sides of the connector and extending beyond the silicon if possible. Try to have the paper indicators lying along the connector in two different directions and orientations, so you have the most chance of detecting a leak.
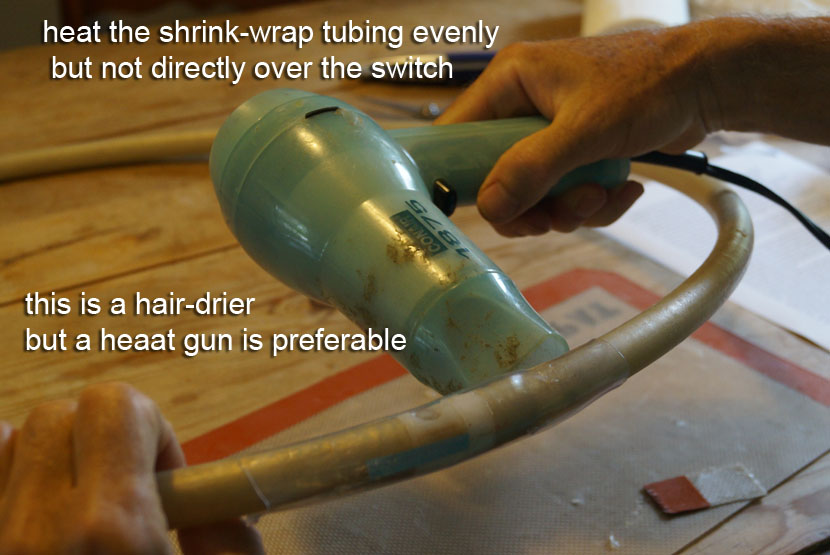
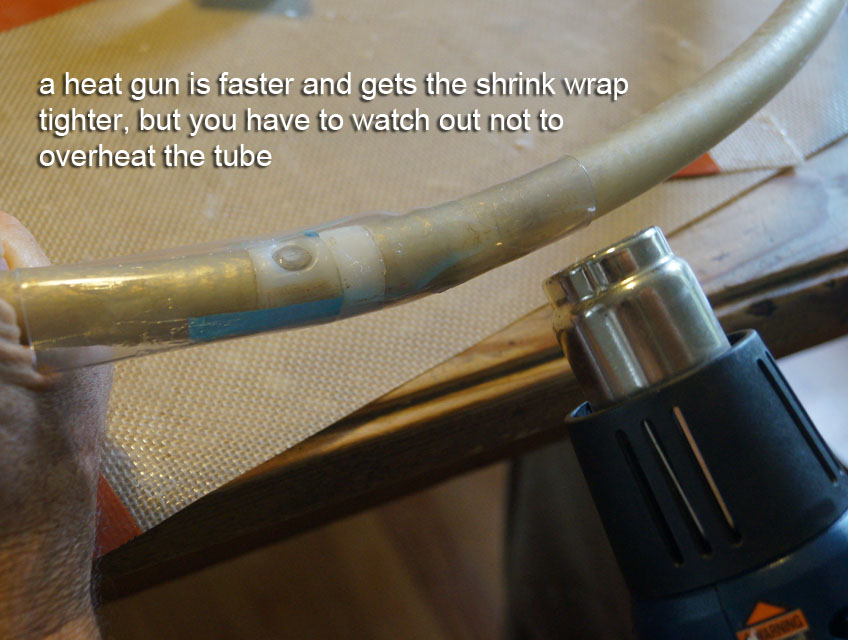
6- Using the heat gun set at around 300 (near the minimum setting) or the hair drier on high heat, evenly heat the area at either end of the shrink wrap till its shrunk and tight to the tube. Leave the area around the switch without shrinking it too much – you want to be able to use the switch easily and if the shrink wrap is tightly pressing on it, the hoop might be turned on by mistake or harder to activate the switch. All the rest of the shrink wrap should be tight to the hoop. Don’t let the end of the heat gun touch the tube – keep it at least ½ inch away and have it slowly moving all the time, all the way around the hoop tube. This whole process should take a minute or two.
It’s worth practicing a couple times with a piece of tubing similar to your hoop tubing, ie HDPE or medium PP or hard PP to heat the shrink wrap evenly and completely without warping to bending or damaging the tubing. If you have a regular non-LED hula hoop you could practice with that. The shrink wrap can easily be cut off with the utility knife.
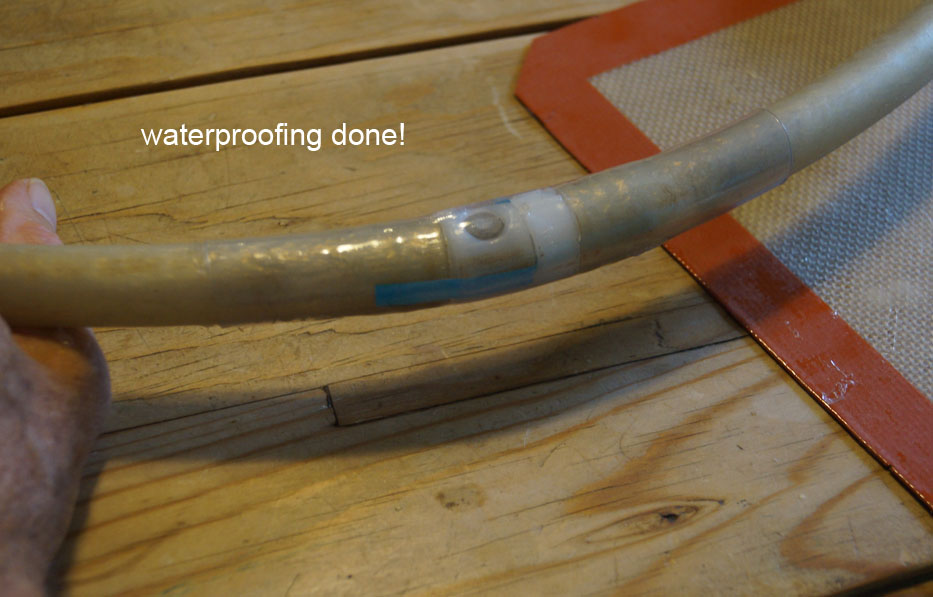
7 – Let the hoop cool completely before stressing it or trying it under water. If you are going out to do a photo shoot or performance or play etc, then test the hoop in a sink or bucket where you can submerge the connector area and the two ends of the shrink wrap, and splash it around a bit, seeing if you can get the paper indicators to turn color. If they are fine, then you can proceed, if they show leakage then you will have to do this process again.

8 – To remove the shrink wrap, put a utility knife or sharp blade flat to the hoop tubing so you don’t cut into the hoop tube, and make a cut all along the shrink wrap tubing – it will cut easily and then remove it and clean up any silicone or water with a rag or paper towel or gently scrape hardened bits off with your fingernails or a flat blade.
9 – Check the hoop frequently as you are using it in the water, and if you ever see the paper indicators turn color, immediately cut the shrink wrap off and dry the outside of the hoop and then the inside of the connector, and blow dry the insides as much as possible with a fan or hair drier. Leave the hoop open in a dry warm place to fully air out.
If you have any other questions about how to waterproof your LED hula hoop be sure to send us an email at merlin@psihoops.com and we will be happy to help!